-

28 February 2013

Flying CSS3 Navigation Menu

VM | 10:52 pm | | Be the first to comment!
T
oday, I would like to show you another pure css3 navigation menu where I implemented several nice animate effects. I have just taught our sub menus to fly from nothing, and beat as the heart when you hover your mouse over elements. If you are ready, lets start.


1. Log in to blogger account and Click drop down.


2. Now select "Template" Like Below.


3. Now you can see Live on blog, Click EDIT HTML Button"

4. Now click Proceed button.
   
5. Find this tag by using Ctrl+F    ]]></b:skin>

6. Paste below code Before ]]></b:skin> tag


#nav,#nav ul {
    list-style: none outside none;
    margin: 0;
    padding: 0;
}
#nav {
    font-family: "Lucida Sans Unicode",Verdana,Arial,sans-serif;
    font-size: 13px;
    height: 36px;
    list-style: none outside none;
    margin: 40px auto;
    text-shadow: 0 -1px 3px #202020;
    width: 980px;

    /* border radius */
    -moz-border-radius:4px;
    -webkit-border-radius:4px;
    border-radius:4px;

    /* box shadow */
    -moz-box-shadow: 0px 3px 3px #cecece;
    -webkit-box-shadow: 0px 3px 3px #cecece;
    box-shadow: 0 3px 4px #8b8b8b;

    /* gradient */
    background-image: -webkit-gradient(linear, left bottom, left top, color-stop(0, #787878), color-stop(0.5, #5E5E5E), color-stop(0.51, #707070), color-stop(1, #838383));
    background-image: -moz-linear-gradient(center bottom, #787878 0%, #5E5E5E 50%, #707070 51%, #838383 100%);
    background-color:#5f5f5f;
}
#nav ul {
    left: -9999px;
    position: absolute;
    top: -9999px;
    z-index: 2;
}
#nav li {
    border-bottom: 1px solid #575757;
    border-left: 1px solid #929292;
    border-right: 1px solid #5d5d5d;
    border-top: 1px solid #797979;
    display: block;
    float: left;
    height: 34px;
    position: relative;
    width: 105px;
}
#nav li:first-child {
    border-left: 0 none;
    margin-left: 5px;
}
#nav li a {
    color: #FFFFFF;
    display: block;
    line-height: 34px;
    outline: medium none;
    text-align: center;
    text-decoration: none;

    /* gradient */
    background-image: -webkit-gradient(linear, left bottom, left top, color-stop(0, #787878), color-stop(0.5, #5E5E5E), color-stop(0.51, #707070), color-stop(1, #838383));
    background-image: -moz-linear-gradient(center bottom, #787878 0%, #5E5E5E 50%, #707070 51%, #838383 100%);
    background-color:#5f5f5f;
}

/* keyframes #animation1 */
@-webkit-keyframes animation1 {
    0% {
        -webkit-transform: scale(1);
    }
    30% {
        -webkit-transform: scale(1.3);
    }
    100% {
        -webkit-transform: scale(1);
    }
}
@-moz-keyframes animation1 {
    0% {
        -moz-transform: scale(1);
    }
    30% {
        -moz-transform: scale(1.3);
    }
    100% {
        -moz-transform: scale(1);
    }
}
#nav li > a:hover {
    /* css3 animation */
    -moz-animation-name: animation1;
    -moz-animation-duration: 0.7s;
    -moz-animation-timing-function: linear;
    -moz-animation-iteration-count: infinite;
    -moz-animation-direction: normal;
    -moz-animation-delay: 0;
    -moz-animation-play-state: running;
    -moz-animation-fill-mode: forwards;

    -webkit-animation-name: animation1;
    -webkit-animation-duration: 0.7s;
    -webkit-animation-timing-function: linear;
    -webkit-animation-iteration-count: infinite;
    -webkit-animation-direction: normal;
    -webkit-animation-delay: 0;
    -webkit-animation-play-state: running;
    -webkit-animation-fill-mode: forwards;
}
#nav li:hover > a {
    z-index: 4;
}
#nav li:hover ul.subs {
    left: 0;
    top: 34px;
    width: 150px;
}
#nav ul li {
    background: none repeat scroll 0 0 #838383;
    box-shadow: 5px 5px 5px rgba(0, 0, 0, 0.5);
    opacity: 0;
    width: 100%;

    /*-webkit-transition:all 0.3s ease-in-out;
    -moz-transition:all 0.3s ease-in-out;
    -o-transition:all 0.3s ease-in-out;
    -ms-transition:all 0.3s ease-in-out;
    transition:all 0.3s ease-in-out;*/

/*if browser not support the animation please enable it by removing "/*" And "*/" above code*/
}

/* keyframes #animation2 */
@-webkit-keyframes animation2 {
    0% {
        margin-left:185px;
    }
    100% {
        margin-left:0px;
        opacity:1;
    }
}
@-moz-keyframes animation2 {
    0% {
        margin-left:185px;
    }
    100% {
        margin-left:0px;
        opacity:1;
    }
}
#nav li:hover ul li {
    /* css3 animation */
    -moz-animation-name: animation2;
    -moz-animation-duration: 0.3s;
    -moz-animation-timing-function: linear;
    -moz-animation-iteration-count: 1;
    -moz-animation-direction: normal;
    -moz-animation-delay: 0;
    -moz-animation-play-state: running;
    -moz-animation-fill-mode: forwards;

    -webkit-animation-name: animation2;
    -webkit-animation-duration: 0.3s;
    -webkit-animation-timing-function: linear;
    -webkit-animation-iteration-count: 1;
    -webkit-animation-direction: normal;
    -webkit-animation-delay: 0;
    -webkit-animation-play-state: running;
    -webkit-animation-fill-mode: forwards;

    /*-webkit-transition:all 0.3s ease-in-out;
    -moz-transition:all 0.3s ease-in-out;
    -o-transition:all 0.3s ease-in-out;
    -ms-transition:all 0.3s ease-in-out;
    transition:all 0.3s ease-in-out;*/

/*if browser not support the animation please enable it by removing "/*" And "*/" above code*/
}
/* animation delays */
#nav li:hover ul li:nth-child(1) {
    -moz-animation-delay: 0;
    -webkit-animation-delay: 0;
}
#nav li:hover ul li:nth-child(2) {
    -moz-animation-delay: 0.05s;
    -webkit-animation-delay: 0.05s;
}
#nav li:hover ul li:nth-child(3) {
    -moz-animation-delay: 0.1s;
    -webkit-animation-delay: 0.1s;
}
#nav li:hover ul li:nth-child(4) {
    -moz-animation-delay: 0.15s;
    -webkit-animation-delay: 0.15s;
}
#nav li:hover ul li:nth-child(5) {
    -moz-animation-delay: 0.2s;
    -webkit-animation-delay: 0.2s;
}
#nav li:hover ul li:nth-child(6) {
    -moz-animation-delay: 0.25s;
    -webkit-animation-delay: 0.25s;
}
#nav li:hover ul li:nth-child(7) {
    -moz-animation-delay: 0.3s;
    -webkit-animation-delay: 0.3s;
}
#nav li:hover ul li:nth-child(8) {
    -moz-animation-delay: 0.35s;
    -webkit-animation-delay: 0.35s;
}
7. Go to blogger and click Layout

8. Click Add Gadget and select 'HTML/Javascript

9. Paste below code


<ul id="nav">
    <li><a href="#">Home</a></li>
    <li><a class="hsubs" href="#">Menu 1</a>
        <ul class="subs">
            <li><a href="#">Submenu 1</a></li>
            <li><a href="#">Submenu 2</a></li>
            <li><a href="#">Submenu 3</a></li>
            <li><a href="#">Submenu 4</a></li>
            <li><a href="#">Submenu 5</a></li>
        </ul>
    </li>
    <li><a class="hsubs" href="#">Menu 2</a>
        <ul class="subs">
            <li><a href="#">Submenu 2-1</a></li>
            <li><a href="#">Submenu 2-2</a></li>
            <li><a href="#">Submenu 2-3</a></li>
            <li><a href="#">Submenu 2-4</a></li>
            <li><a href="#">Submenu 2-5</a></li>
            <li><a href="#">Submenu 2-6</a></li>
            <li><a href="#">Submenu 2-7</a></li>
            <li><a href="#">Submenu 2-8</a></li>
        </ul>
    </li>
    <li><a class="hsubs" href="#">Menu 3</a>
        <ul class="subs">
            <li><a href="#">Submenu 3-1</a></li>
            <li><a href="#">Submenu 3-2</a></li>
            <li><a href="#">Submenu 3-3</a></li>
            <li><a href="#">Submenu 3-4</a></li>
            <li><a href="#">Submenu 3-5</a></li>
        </ul>
    </li>
    <li><a href="#">Menu 4</a></li>
    <li><a href="#">Menu 5</a></li>
    <li><a href="#">Menu 6</a></li>
    <li><a href="#">Back</a></li>
</ul>

Replace the # With your Link

10. Now save your HTML/Javascript'.

    You are done...
 
Read More »

27 February 2013

Black and Blue simple Menu Bar

VM | 1:44 pm | | | Be the first to comment!
M
enu bar is very important in blogger.Because it helps to navigate your blog or website easily.It mean they can find easily  what  they  looking  for.  In  this  tutorial im gonna explain  how  to  add    Css3    menu  bar  for  blogger. Its  include nice  hover  style.Im  using Css3 and HTML, Just
check out demo


1. Log in to blogger account and Click drop down.


2. Now select "Template" Like Below.


3. Now you can see Live on blog, Click EDIT HTML Button"

4. Now click Proceed button.
   
5. Find this tag by using Ctrl+F    ]]></b:skin>

6. Paste below code Before ]]></b:skin> tag


@import url(http://fonts.googleapis.com/css?family=Open+Sans:600);
/* Menu CSS */
#cssmenu, #cssmenu > ul{
background:#24459A;
padding-bottom: 3px;
font-family: 'Open Sans', sans-serif;
font-weight: 600;
}
#cssmenu:before, #cssmenu:after, #cssmenu > ul:before, #cssmenu > ul:after {
content: '';
display: table;
}
#cssmenu:after, #cssmenu > ul:after {
clear: both;
}
#cssmenu {
zoom:1;
}
#cssmenu > ul{
background:black;
margin: 0;
padding: 0;
position: relative;
}
#cssmenu > ul li{
margin: 0;
padding: 0;
list-style: none;
}
#cssmenu > ul > li{
float: left;
position: relative;
}
#cssmenu > ul > li > a{
padding: 23px 26px;
display: block;
color: white;
font-size: 13px;
text-decoration: none;
text-transform: uppercase;
text-shadow: 0 -1px 0 #0d0d0d;
text-shadow: 0 -1px 0 rgba(0, 0, 0, .70);
line-height: 18px;
}
#cssmenu > ul > li:hover > a{
background:#24459A;
text-shadow: 0 -1px 0 #97321f;
text-shadow: 0 -1px 0 rgba(122, 42, 26, .64);
}
#cssmenu > ul > li > a > span{
line-height: 18px;
}
#cssmenu > ul > li.active > a, #cssmenu > ul > li > a:active{
background: #24459A;
}
/* Childs */
#cssmenu > ul ul{
opacity: 0;
visibility: hidden;
position: absolute;
top: 120px;
background:black;
margin: 0;
padding: 0;
z-index: -1;
-webkit-transition: all .35s .2s ease-in-out;
-moz-transition: all .35s .2s ease-in-out;
-ms-transition: all .35s .2s ease-in-out;
transition: all .35s .2s ease-in-out;
}
#cssmenu > ul li:hover ul{
opacity: 1;
visibility: visible;
margin: 0;
color: #000;
z-index: 2;
top:64px;
left: 0;
}
#cssmenu > ul ul:before{
content: '';
position: absolute;
top: -10px;
width: 100%;
height: 20px;
background: transparent;
}
#cssmenu > ul ul li{
list-style: none;
padding: 0;
margin: 0;
width: 100%;
}
#cssmenu > ul ul li a{
padding: 18px 26px;
display: block;
color: white;
font-size: 13px;
text-decoration: none;
text-transform: uppercase;
width: 150px;
border-left: 4px solid transparent;
-webkit-transition: all .35s ease-in-out;
-moz-transition: all .35s ease-in-out;
-ms-transition: all .35s ease-in-out;
transition: all .35s ease-in-out;
}
#cssmenu > ul ul li a:hover{
background:#24459A;
}
#cssmenu > ul ul li a:active{
background: url(https://blogger.googleusercontent.com/img/b/R29vZ2xl/AVvXsEgcsTtufe7ZT-jkIrCFykqWABR3l19abn0panUORzFsypGzZ8iAhr5-4EMcr3ARqL7mp5oKZpXbb2zUj-cUgeuR678Ph1hIpyVgwpEr2IbmlT-WcYixlh8UaJ9ekAuGVKRO9ARHBX7I9M0/s1600/menu-bg.png) repeat;
}menu > ul > li > ul > li > ul{
left: 202px;
top: 1px;
width: 200px;
}
#cssmenu > ul > li > ul > li > ul > li{
float: none;

7. Go to blogger and click Layout

8. Click Add Gadget and select 'HTML/Javascript

9. Paste below code.


        <div id="cssmenu">
<ul>
<li class="active "><a href="/"><span>Home</span></a></li>
<li class="has-sub "><a href="#"><span>Templates</span></a>
<ul>
<li><a href="#"><span>Blogger</span></a></li>
<li><a href="#"><span>WordPress</span></a></li>
</ul>
</li>
<li><a href="#"><span>Write For Us</span></a></li>
<li><a href="#"><span>Videos</span></a></li>
<li><a href="#"><span>Contact</span></a></li>
<li><a href="#"><span>Privacy</span></a></li>
<li><a rel="author" href="#"><span>About</span></a></li>
</ul>
</div>

Replace the # With your Link

10. Now save your HTML/Javascript'.

    You are done...

Read More »

Ribbon Hover Effect Menu Bar

VM | 1:24 pm | | | Be the first to comment!
T
oday im   gonna explain how to  add modern ribbon menu  bar  for blogger.  Few  weeks  ago i  published another Ribbon  menu  style. but this is different with hover  style. Hope you  will like it.Im using Css3 and HTML, Just check out demo.


1. Log in to blogger account and Click drop down.


2. Now select "Template" Like Below.


3. Now you can see Live on blog, Click EDIT HTML Button"

4. Now click Proceed button.
   
5. Find this tag by using Ctrl+F    ]]></b:skin>

6. Paste below code Before ]]></b:skin> tag

.ribbon span {
    background:#A81B6A;
    display:inline-block;
    line-height:3em;
    padding:0 1em;
    margin-top:0.5em;
    position:relative;
      -webkit-transition: background-color 0.2s, margin-top 0.2s;  /* Saf3.2+, Chrome */
    -moz-transition: background-color 0.2s, margin-top 0.2s;  /* FF4+ */
    -ms-transition: background-color 0.2s, margin-top 0.2s;  /* IE10 */
    -o-transition: background-color 0.2s, margin-top 0.2s;  /* Opera 10.5+ */
    transition: background-color 0.2s, margin-top 0.2s;
}
.ribbon a:hover span {
    background:#FFD204;
    margin-top:0;
  
}
.ribbon span:before {
    content: "";
    position:absolute;
    top:3em;
    left:0;
    border-right:0.5em solid #9B8651;
    border-bottom:0.5em solid #fff;
}

.ribbon span:after {
    content: "";
    position:absolute;
    top:3em;
    right:0;
    border-left:0.5em solid #9B8651;
    border-bottom:0.5em solid #fff;
}
.ribbon a:link, .ribbon a:visited {
    color:#000;
    text-decoration:none;
    float:left;
    height:3.5em;
    overflow:hidden;
}
.ribbon:after, .ribbon:before {
    margin-top:0.5em;
    content: "";
    float:left;
   border: 1.5em solid #A81B6A;
}
.ribbon:after {
    border-right-color:transparent;
}

.ribbon:before {
    border-left-color:transparent;
}

7. Go to blogger and click Layout

8. Click Add Gadget and select 'HTML/Javascript

9. Paste below code.

<div class='ribbon'>
    <a href='#'><span>Home</span></a>
    <a href='#'><span>Download</span></a>
    <a href='#'><span>Css3</span></a>
    <a href='#'><span>HTML</span></a>
    <a href='#'><span>MySQL</span></a>
    <a href='#'><span>Services</span></a>
    <a href='#'><span>Contact</span></a>
</div>

Read More »

24 February 2013

Add Animated Fancy Navigation Menu with Jquery to Blogger / Blogspot

VM | 9:59 pm | | Be the first to comment!
A
nimated Fancy Navigation Menu with Jquery for Blogger. Every One has trying to add a beautiful menu with animation effect by jquery to their Blogger Blogs. But it has very difficult to add a menu to blogger blogs


How to Install?

  • Go to Blogger Dashboard > Design tab.
  • Click on Add a Gadget any where in your Layout.
  • Choose LinkList Gadget and Leave Title Field as Blank
  • Try to Add Some Links and Save Gadget 

  • Edit LinkList Widget Once again, And Copy Widget ID From URL like in Image  
 Make Sure the ID may Exact to match in the URL even a Block Letters(Capital Letters) Also for Perfect Working of This Widget! 

 Here is LinkList1 is the widget ID in this URL , if its LinkList1 leave it as its....

or

But If its LinkList2 Replace  that ID in Code ......also .........


  1. Log in to blogger account and Click drop down.


 2.Now select "Template" Like Below.


3. Now you can see Live on blog, Click EDIT HTML Button"

4. Now click Proceed button.
   
5. Find this tag by using Ctrl+F    ]]></b:skin>

6. Paste below code Before ]]></b:skin> tag

The widget  ID is  LinkList2 Replace  that ID in Code also


 #Linklist1 h2{display:none}
    #Linklist1 ul{background: url("https://blogger.googleusercontent.com/img/b/R29vZ2xl/AVvXsEjqu25y3x5wxwTcImvBjusnpMYn19AurtD1Go4MF59UVKHRFXXVuk1Y4ywW4pBMezVvA5ASWsVMAvEqQxkfD8cQveZIQlPJcytTE8uKpF0BnSg_KqFXVbXqB1bTo9fOSzoB7M4-olGUHN3A/s1600/way2blogging-fancymenubg.gif") repeat-x scroll 0 0 transparent;width: 100%;margin: 0;padding: 0;list-style: none;float: left;font-size: 1.1em;}
    #Linklist1 ul li{margin: 0;padding: 0;overflow: hidden;float: left;height:40px;}
    #Linklist1 ul li a, #Linklist1 ul li span { padding: 10px 20px;float:left;text-decoration:none;color: #fff;background: url(https://blogger.googleusercontent.com/img/b/R29vZ2xl/AVvXsEjqu25y3x5wxwTcImvBjusnpMYn19AurtD1Go4MF59UVKHRFXXVuk1Y4ywW4pBMezVvA5ASWsVMAvEqQxkfD8cQveZIQlPJcytTE8uKpF0BnSg_KqFXVbXqB1bTo9fOSzoB7M4-olGUHN3A/) repeat-x;text-transform: uppercase;clear: both;width: 100%;height: 20px;line-height: 20px;}
    #Linklist1 ul li a{ color: #555;background-position: left bottom;}
    #Linklist1 ul li span{ background-position: left top;}

7. Find this tag by using Ctrl+F    /head

8.Paste below code Before  /head

<script type="text/javascript" src="http://ajax.googleapis.com/ajax/libs/jquery/1.6.4/jquery.min.js"></script>
<script type="text/javascript">
    //<![CDATA[
    $(document).ready(function () {
    $("#Linklist1 ul li").prepend("<span></span>");
    $("#Linklist1 ul li").each(function () {
        var linkText = $(this).find("a").html();
        $(this).find("span").show().html(linkText)
    });
    $("#Linklist1 ul li").hover(function () {
        $(this).find("span").stop().animate({
        marginTop: "-40"
        }, 250)
    }, function () {
        $(this).find("span").stop().animate({
        marginTop: "0"
        }, 250)
    })
    });
    //]]>
</script> 

9.Save your template, You are Done!.
Read More »

22 February 2013

Twitter Style Hover Button Recreated in Pure CSS

VM | 7:38 pm | | Be the first to comment!
 How to add this button to your blog post

Twitter Style Button 

At first we have to add the skin of these both buttons. that's adding CSS part into your blogger template. Lets see how to do it.
  • Go to Blogger Dashboard > Template
  • Backup your Template before making any changes to your blog
  • Click on Edit HTML
  • Tick Expand Widget Templates
  • Press Ctrl + F and search the code shown below ▼

]]></b:skin>

Now add the below code just Above/Before ]]></b:skin> (use Ctrl+F to find the code)

.btn {
position: relative;
display: inline-block;
overflow: visible;
padding: 5px 10px;
font-size: 18px;
font-weight: bold;
line-height: 18px;
color: #333;
text-shadow: 0 1px 0 rgba(255, 255, 255, .5);
background-color: #CCC;
background-repeat: no-repeat;
border: 1px solid #CCC;
cursor: pointer;
-webkit-border-radius: 4px;
-moz-border-radius: 4px;
border-radius: 4px;
-webkit-box-shadow: 0 1px 0 rgba(255, 255, 255, .5);
-moz-box-shadow: 0 1px 0 rgba(255,255,255,.5);
box-shadow: 0 1px 0 rgba(255, 255, 255, .5);
text-decoration: none !important;
margin-top:15px;
margin-left:5px;
}

.tgtwit-btn {
color: white !important;
text-shadow: 0 -1px 0 rgba(0, 0, 0, .25);
background-color: #019AD2;
background-repeat: repeat-x;
background-image: -khtml-gradient(linear,left top,left bottom,from(#33BCEF),to(#019AD2));
background-image: -moz-linear-gradient(#33BCEF,#019AD2);
background-image: -ms-linear-gradient(#33BCEF,#019AD2);
background-image: -webkit-gradient(linear,left top,left bottom,color-stop(0%,#33BCEF),color-stop(100%,#019AD2));
background-image: -webkit-linear-gradient(#33BCEF,#019AD2);
background-image: -o-linear-gradient(#33BCEF,#019AD2);
background-image: linear-gradient(#33BCEF,#019AD2);
filter: progid:DXImageTransform.Microsoft.gradient(startColorstr='#33bcef',endColorstr='#019ad2',GradientType=0);
border-color: #057ED0 !important;
-webkit-box-shadow: inset 0 1px 0 rgba(255, 255, 255, .1);
-moz-box-shadow: inset 0 1px 0 rgba(255,255,255,.1);
box-shadow: inset 0 1px 0 rgba(255, 255, 255, .1);
}

.tgtwit-btn:hover {
color: white !important;
background-color: #0271BF;
background-repeat: repeat-x;
background-image: -khtml-gradient(linear,left top,left bottom,from(#2DADDC),to(#0271BF));
background-image: -moz-linear-gradient(#2DADDC,#0271BF);
background-image: -ms-linear-gradient(#2DADDC,#0271BF);
background-image: -webkit-gradient(linear,left top,left bottom,color-stop(0%,#2DADDC),color-stop(100%,#0271BF));
background-image: -webkit-linear-gradient(#2DADDC,#0271BF);
background-image: -o-linear-gradient(#2DADDC,#0271BF);
background-image: linear-gradient(#2DADDC,#0271BF);
filter: progid:DXImageTransform.Microsoft.gradient(startColorstr='#2daddc',endColorstr='#0271bf',GradientType=0);
border-color: #096EB3 !important;
}

Save your Template and we have successfully added the skin of Twitter style hover button. Use the following HTML code snippet to add this button to your website/blog post.

<a class="btn tgtwit-btn" href="Your Link URL">Button Text</a>
Read More »

CSS3 Hover Animation Effect for Your Blog Post Title

VM | 7:29 pm | | Be the first to comment!
css3 animation effect
How to add this animation to blog post title
As I mentioned above you can easily add this trick into your blogger blog by applaying simple CSS3 code into your template and you don't wanna add separate html code for this animation effect. Please follow the below steps.
 
  1. Go to Blogger Dashboard > Template
  2. Backup your Template before making any changes to your blog
  3. Click on Edit HTML
  4. Tick Expand Widget Templates
  5. Press Ctrl + F and search the code shown below 
 ]]></b:skin>
Now add the below code just Above/Before ]]></b:skin> (use Ctrl+F to find the code)

.post h2 {
margin:.1em 0 0;
padding:0 0 4px;
font-size:1.0em;
font-weight:normal;
line-height:2.5em;
color:#444;
font-family: Oswald, Serif;
}
.post h2 a, .post h2 a:visited, .post h2 strong {
display:block;
text-decoration:none;
color:#444;
font-size:2.0em;
font-weight:normal;
font-family: Oswald, Serif;
}
.post h2 strong, .post h2 a:hover {
color:#0274be;
background: url("http://iconkits.com/images/vip/aerozone_arrow_small_preview.png") no-repeat 4px center transparent;
padding: 3px 10px 3px 50px;
-moz-transition: all 1s ease-out;
-o-transition: all 1s ease-out;
-webkit-transition: all 1s ease-out;
-ms-transition: all 1s ease-out;
transition: all 1s ease-out;
Read More »

Text customization - Magazine Style Text

VM | 7:24 pm | Be the first to comment!
H
ere's another way you can customize your Blog. In this case, your Post. This tutorial will be about Magazine text style in Blogger Posts. You often see this style in newspapers, literature, magazines....It looks all right.

And here are two different Magazine styles:

Drop CAPS


Big size of the First letter in the PostTo achieve this effect, you have to place some code in your EDIT HTML section of Post Editor.


Code for DROP CAPS:

<span style="float:left;color:#000000;font-size:100px;
line-height:70px;padding-top:2px;font-family: Times, serif, Georgia;">L</span>

Ok. You have to "surround" your letter with this code. For example, I've surrounded letterL (in orange), which will be on the beginning of my Post.
You can change some settings if you like:

- color: #000000 (black) to whatever hex color you like (you can use color names also)
- font-size: just change 100px to whatever
- font-family: Times, Arial, Verdana....
- padding

Code for BIG FIRST LETTER:
<span style="font-family:Georgia,;color:#000000;
font-size:56px;font-weight:normal;line-height:80%;letter-spacing:-6px;">L</span>

Same thing here. Here's the example of some text in editor, and placed code:


If you are going to do this often, and it bothers you to copy so much code every time, you can create some CSS style in your HTML template code. Go to:
DASHBOARD --> LAYOUT --> EDIT HTML, place the following code (white), above existing (orange):

.dropcap {
float:left;
color:#000000;
font-size:100px;
line-height:70px;
padding-top:2px;
font-family: Times, serif, Georgia;
}


body {
background:$bgcolor;
margin:0;
color:$textcolor;

Save Settings. Now, next time you want to "surround" your first letter with code, it will look like this:
<span class="dropcap">L</span>

This was a CSS for DROP CAPS, for BIG FIRST LETTER it's the same story, just change the CSS part, so it will look like this:

.bigfirst {
font-weight:normal;
color:#000000;
font-size:56px;
line-height:80%;
letter-spacing:-6px;
font-family: Times, serif, Georgia;
}

When you're "surrounding" your letter, you'll use this code:
<span class="bigfirst">L</span>
NOTE:
- it is recommended to apply code at the end, and publish it from EDIT HTML mode (sometimes, if you switch from compose to HTML, it can undo the change - this doesn't happen if you placed CSS in your template)
- you can (and sometimes you'll have to) adjust font size, padding, color in the code
- you can use paragraphs to gain some line space between Post title and Content text
<p>
<span style="float:left;color:#000000;font-size:100px;line-height:70px;padding-top:2px;font-family: times;">L</span>orem ipsum dolor sit amet, consectetuer adipiscing elit. Duis id odio quis ipsum fermentum dapibus. Nam magna. Aenean quis dolor ac enim luctus tristique. Aliquam sagittis accumsan est.
</p>

That's about it. Remember to change some colors! You can find some hex values here...

Smile!
Read More »

More Pictures in one row or side by side view

VM | 6:24 pm | Be the first to comment!
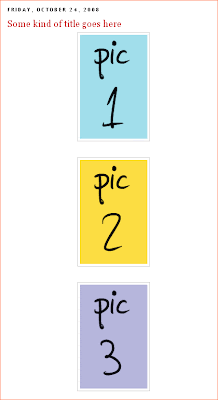
By default, when you upload pictures (images, or videos)) into your Blogger Posts, they are placed one after another. In one column.


The only thing we can choose, is to align them (left-center-right). There's no option to organize them so they can be next to each other, in one row (horizontal).
The best way to do this, is using the TABLES (if you want to know more about HTML Tables, visit www.w3schools.com).

1. You have to find out what is the WIDTH of your post area. To calculate how many pics can fit there. In Blogger, go to LAYOUT --> EDIT HTML, and in code section, find the following:
#main-wrapper {
width: 410px;
...so, in my case, it's 410 px. But you can't use all of it. Margins are also included. So, you can use about 390-400px.

2. Calculating. How many pics will fit.
Important thing to know is, when we place pictures in the table, we will make them smaller. But clicking on each, they will open in full size.

3. Upload pictures to:
- free web host service to get the URL address (Photobucket, Picasa, TinyPic...)
- or upload pics directly (through blogger), and get the code from there

4. Let's make a table. I'll make one with 1 Row (horizontal), and 3 Columns (vertical). And place my pics in it.
PLACE THE CODE IN "EDIT HTML" MODE! See the picture:
Here's the code for it:
<table border="0">
<tr>
<td><a href="PIC 1 URL" target="_blank" title="View">
<img height=200 width=120 src="PIC 1 URL" alt="pic name"/></a></td>
<td><a href="PIC 2 URL" target="_blank" title="View">
<img height=200 width=120 src="PIC 2 URL" alt="pic name"/></a></td>
<td><a href="PIC 3 URL" target="_blank" title="View">
<img height=200 width=120 src="PIC 3 URL" alt="pic name"/></a></td>
</tr>
</table>
....REPLACE the lines in orange, with your pics URL (from a free web host).
....in blue, change number 0 to 1,2,3,4.....if you want a border around the table
....adjust width accordingly to width of post area (120 + 120 + 120 = 360 px, it fits into 410 px)
....change the green text to whatever (you can see this when placing your mouse cursor on the pic)
....in purple, give your picture a name (for search engines)
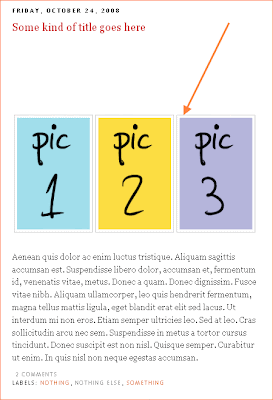
....and here's the result:


...when you click on your pic, you'll see the full size of it...

PROBLEMS:
► if you haven't deactivated it, the default blogger border will still appear around the pic (look at the arrow in the picture above) . If you want to remove it from certain pics, add some style (in orange) to the the existing line (in white):
<td><a href="PIC 2 URL" target="_blank" title="View">
<img height=200 width=120 src="PIC 2 URL" alt="pic name" style="border:none;"/></a></td>
...use the same rule for every picture...

► notice a lot of empty space between Title and Table. This happens because Blogger adds a <br /> tag for each time you press the Enter key to start a new line. To reduce it, add the following code ABOVE the table:
<style type="text/css">.nobrtable br { display: none }</style>
<div class="nobrtable">
...and this one UNDER the table:
</div>
So, these are the basics. It ain't so complicated, and there's a million options. You can use Tables for:
inserting pictures (make more rows, columns....)
placing text, making bullet lists
placing videos side by side
really, whatever you can think of....
Options:

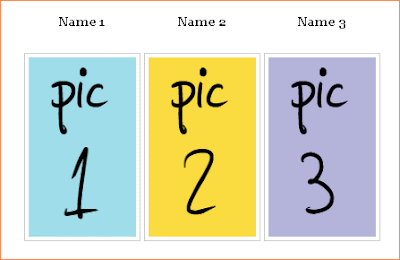
-- add some headings to the pictures, make another row, and place it above (or under) the pictures. For my example, like this:
<table border="0">
<tr>
<th align="center">Name 1</th>
<th align="center">Name 2</th>
<th align="center">Name 3</th>
</tr>
<tr>
<td><a href="http://i34.tinypic.com/95pfk6.jpg" target="_blank" title="View">
<img src="http://i34.tinypic.com/95pfk6.jpg" alt="pic name" width="120" height="200" /></a></td>
<td><a href="http://i37.tinypic.com/nq5yfp.jpg" target="_blank" title="View">
<img src="http://i37.tinypic.com/nq5yfp.jpg" alt="pic name" width="120" height="200" /></a></td>
<td><a href="http://i36.tinypic.com/iwuf85.jpg" target="_blank" title="View">
<img src="http://i36.tinypic.com/iwuf85.jpg" alt="pic name" width="120" height="200" /></a></td>
</tr>
</table>
...added row is in orange
...you can change the alignment into right, left (in green)


...if you'd like to change font color, size, family, add this code:
<font size="6" face="arial" color="#000000"></font>
...change the styles to whatever suits you...

-- leave an empty cell by not placing nothing between:
<td></td>
-- fill the cell with text, instead of picture:
<td>Some text goes here...</td>
-- color the cell with some color:
<td bgcolor="#000000">Some text here...</td>
-- add some space (padding) from borders:
<table border="0" cellpadding="10">
-- create bullet list in the cell:
<td>Title of the list
<ul>
<li>something</li>
<li>something else</li>
<li>nothing</li>
</ul>
</td>

That's about it....Learn more visiting www.w3schools.com.

CONCLUSION:
This can look like a big deal, but really, it's not. When you do it once, you're ready. Save the code somewhere (Notepad, ....), just copy it, and paste when composing post.
You can also create tables using any HTML editor (like Dreamweaver, for example). Just copy the code from it....
There's also a way of doing this through Windows Live Writer, if you're using it.

If you'll need help, ask....

Smile!
Read More »

Widget customization - how to style each widget differently

VM | 6:16 pm | Be the first to comment!
Well, this is interesting. We've already learned  to tweak and stylize our Blogger widgets (gadgets), in general. For example adding icon beside sidebar title heading and placing icon or image beside Labels and Links. That's cool. But now, we'll learn how to tweak and style each widget (gadget) differently! Meaning:
 each of your widgets (Labels, Archive, Links, custom widget) can have it's own looks (color, font, borders, images....anything!)
remember that WIDGET is the same thing as GADGET

Ok, here's the simple example:


I've chosen to differ my widgets a bit, so I changed a the style of Labels, Links, Archive and Picture widget. I choose these widgets just for this example. Remember that you can do this with every other widget too!


There are a few simple steps you'll have to take:

► choose which widget you'd like to style, and identify it in Blogger HTML code
► add some CSS style in the code that will spice up our widget
► don't lose your marbles (be patient and creative)


Choosing and Identifying

Each widget added in Blogger Layout has a unique ID. We will use this ID to apply some style to our widget. So, our job is to dive into the Blogger HTML code, and locate these ID's. Let's go. From your Dashboard, go to:
LAYOUT ► EDIT HTML ► and scroll all the way to the bottom. Because I choose to style my Sidebar widgets (gadgets), I'll look inside of sidebar-wrapper. In my case, the code looks like this:

<div id='sidebar-wrapper'>
<b:section class='sidebar' id='sidebar' preferred='yes'>
<b:widget id='Label1' locked='false' title='Labels' type='Label'/>
<b:widget id='LinkList1' locked='false' title='Links' type='LinkList'/>
<b:widget id='Image1' locked='false' title='My Picture' type='Image'/>
<b:widget id='BlogArchive2' locked='false' title='Blog Archive' type='BlogArchive'/>
</b:section>
</div>
Ok. You can see the ID's of my widgets:
Label widget ID ► Label1
Links widget ID ► LinkList1
Picture widget ID ► Image1
Archive widget ID ► BlogArchive2

Sometimes, if you have a lot of custom widgets, it's hard to guess it's ID. In this case, just remember that their position is the same as they appear in your Blog frontpage. If the Labels widget is in the 1st place, it will be in the 1st place in the code too..
First step is done. Let's move on.


Styling and tweaking

Now, the fun part. To style the widget, you'll have to know a bit of CSS. But don't worry, you can get this in minutes. In previous step , we've learned to identify the ID of our widget. Now, we'll use it. Let's start with customizing the Link List widget. From Blogger Dashboard, we'll go to:
LAYOUT ► EDIT HTML ► and locate this part (for easier searching, use CTRL + F, and type "/head"):


]]></b:skin>
</head>
ABOVE this part, you'll place the CSS style for your custom Link List Widget (gadget), so the whole thing will look like this:

#LinkList1 {
background:#FFF4BF;
padding-left:15px;
font:14px Arial;
border-bottom:2px solid #FFE25F;
}

#LinkList1 h2 {
background: url(http://i40.tinypic.com/wummhj.jpg) no-repeat bottom left;
height:35px;
padding-top:10px;
font-size:0px;
}

#LinkList1 a:link {
color:#5F5F5F;
text-decoration:none;
}
#LinkList1 a:visited {
color:#5F5F5F;
text-decoration:none;
}
#LinkList1 a:hover {
color:$titlecolor;
text-decoration:underline;
}

]]></b:skin>
</head>
Now to explain a bit:
The part in blue is the style for the specific widget box (in this case Link List). You can change background, font style, position, colors, borders of the widget.
Green part is defining only the HEADING of the widget. In my example, I've placed a picture instead of regular text, and with the "font-size:0px" the original heading is hidden. Pretty cool. This way, you can have different heading for each widget in your Blogger template!
In orange, I've defined how my LINK and HOVER colors will look like. I had to do this because the background of my new widget style was blending with original default link color. Now you know that you can use different colors for your links in every widget!

Here is the complete code with Labels and Picture widget (for my example):
View the code here.


Ok, I think you've got it. Remember, this was just an example. You can do a lot more. The only important thing is to remember that you have to IDENTIFY your widget, and STYLE it through your Blogger code.

A little patience and a few cookies, and you're there.....

Smile!  
Read More »

Post Title customization for blogger

VM | 6:00 pm | Be the first to comment!


How to customize your blogger Post Title...we can add some background picture behind the post title, or borders, change font......................well, a lot.


Before doing any customization, back up your template. Just in case....
Let's start with the beginning. Heh.

For customization, we will use the CSS style in the code section that corresponds to ourPost Title:
.post h3 {
margin:.25em 0 0;
padding:0 0 4px;
font-size:140%;
font-weight:normal;
line-height:1.4em;
color:$titlecolor;
}


.....Attention:
this example is made in Minima Blogger default template, so your actual code may differ a bit
it's important to find the part ".post h3", or if you have custom template, the find the part that "carries" the style for your Post Title...It's also important to know the width of your Post Title area, which is basically the same as your Post Content area ("main-wrapper" by default). This information, you'll find in this part of code:
#main-wrapper {
width: 410px;...in orange, you can see the width, which is (in my case) 410px (pixels).

Attention again:

this is an example for Minima default template, your width can be different (or is)
"main-wrapper" represents Post Content area in Minima template, but yours can differ...(for example, the Post Content area in Rounders default template is called "#main-wrap1")
if you have custom template, you just have to find what part of the style (code) corresponds to your Post Content area...Let's do something, already....

BACKGROUND PICTURE IN POST TITLE
 

To add a background picture behind our Post Title, we have to do 4 small things:

1. check the width of Post Title area (or Post Content area, or) -- like in example ABOVE
2. create (or find) a picture for our background, which will be the same width as Post Title / Content area......(you can make the width smaller, of course, but if you make it bigger, it will be "cropped")......you can choose height of the pic as you wish....
3. upload the picture to a free web host (Photobucket, Picasa, TinyPic....) to get the URL address
4. place the URL address in the code, so our pretty background can show up.....

....when you do the first 3 things, go to LAYOUT --> EDIT HTML --> and in the Post Title CSS style/code, add the some lines:
.post h3 {
background: url(URL OF HOSTED PICTURE); background-repeat:no-repeat;
height:55px;
margin:.25em 0 0;
padding:14px 40px 4px;
font-size:140%;
font-weight:normal;
line-height:1.4em;
color:$titlecolor;
}


....in orange, we've added some background settings, and our picture (you have to replace CAPS with the URL adress of your hosted picture)


....in blue, we've added the line which tells Blogger that our picture has a certain height...you'll change this value corresponding to the height of YOUR PIC

....in green, you have to adjust your Title to fit into picture, change the value (higher value--> pushes the title more down)

....and in pink you can "push" your Title to the right, increasing this value....


Taa- daaam! That's it......


be creative, you can do whatever you want.....

if you'll need any advice, just ask.....I'll help. Promise.

COLORS AND BORDERS IN THE POST TITLE


This is a much simple way of customizing Post Titles in Blogger. And you can create great effect with it, also......

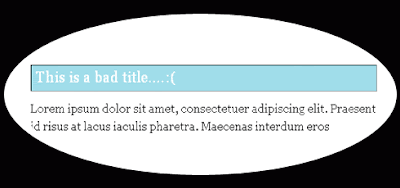
Here's the example of using some border styles and some background color:

LAYOUT --> EDIT HTML --> locate the Post Title CSS style/code, and add the following lines:


.post h3 {
background:#9fddea;
border:1px inset #000000;
margin:.25em 0 0;
padding:0 5px 4px;
font-size:140%;
font-weight:normal;
line-height:1.4em;
color:$titlecolor;

}


....in orange, we've added some background color (you can choose any hex value you like)


....in green, we've choose a border "1px" thick, with color #000000 (black), and "inset" style....more about border styles here....

....in blue, we "pushed" our title a little bit to the right, so it's not to close to a border (higher value --> pushes more to the right)


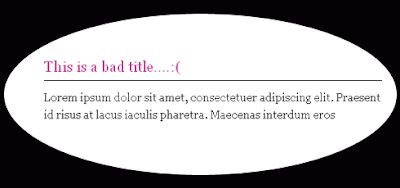
....if you want your Post Title to be underlined....use this line:

border-bottom:1px solid #000000;....of course, change the width, color and border style to whatever suits you....


....well, that's about it. If you are interested in some more customization of Post Titles, or you want something else, read the article about placing icons in Post Titles.....
Read More »

Hex Color Code Generator Tool

VM | 5:42 pm | Be the first to comment!
How To Use it?
  1. First drag the bar on the "Hue" selector to the area of your desired colour palate. 
  2. Then click inside the Brightness/Saturation area and drag the cursor until you have achieved your desired colour. The "Swatch" bar shows you the final colour result.
  3. The hexadecimal colour code is generated in the "Hex" box. Simply copy the six digit code i.e #741010


------------------------------------------------------------------------------------------------------------
How To Use it?

  1. Select any color in rotating wheel then the color and matching color code will start appearing in Boxes.
  2. If you want to match color with your hex code then paste six digit colour code in the form below without the hash (#) sign and then hit Update.
  3. You can then copy the hex values and start using them!
Read More »

How To Split Blogger Header Into 2 Section

VM | 5:33 pm | Be the first to comment!


Blogger is having very simple layout which you can customize through template designer.You can add two sidebar or 3 column footer to your blog but there is no way by which you can split your blog header in two parts. Splitting your blog header and adding Adsense ads can help to boost your CPC And Clicks, you can also add any widget in your blog header like search box of social sharing button.Just follow below steps to divide your blog header in two parts.

Step 1


  • Go to Blogger Dashboard
  • Click On Template >> Edit HTML >> Proceed
  • Make Sure That Expand Widget Template checkbox is UNCHECKED
  • Now find below code there


<b:section class='header' id='header' maxwidgets='1' showaddelement='no'>
<b:widget id='Header1' locked='true' title='My Test Blog (Header)' type='Header'/>
</b:section>
  • Insert Following Code Right Under (after) It.


<b:section id='header-right' showaddelement='yes'/>
<div style='clear: both;'/>
  • Finally Codes Should Like Like This:


<b:section class='header' id='header' maxwidgets='1' showaddelement='no'>
<b:widget id='Header1' locked='true' title='Blogger Sentral Widget Showcase (Header)' type='Header'/>
</b:section>
<b:section id='header-right' showaddelement='yes'/>
<div style='clear: both;'/>

Step 2


  • Now Find ]]></b:skin> 
  • Paste Below Code Above ]]></b:skin>


#header, body#layout #header {width:45%;display:inline-block;float:left;}
#header-right, body#layout #header-right {width:40%;display:inline-block;float:right;padding:15px;}
#header-right .widget {margin:0;}

  •  You can easily see highlighted text in code.Adjust Both header width according to your choice.
  • After Finishing All Steps Click On Save Template Button And Enjoy Your Second Header.


Adding Widget In Header


  • Go to Blogger Dashboard
  • Click On Layout Tab 
  • There you will find add gadget option next to your blogger header just click on it and add any widget you want to add.

Read More »

21 February 2013

HOW TO ADD COLOURFULL SOCIAL BUTTONS TO BLOGGER WITH HOVER EFFECT?

VM | 7:33 pm | Be the first to comment!
Something is fishy happening in google headquarters every day they  started the morning with a new penalty for bloggers and webmasters by releasing algorithm updates,changing there polices and doing something strange to keep SERP clean. They have released latest algo updates two times a month in the history of algorithms.
So bloggers and webmasters keeping google aside are taking shadows of social media quality Dofollow backlinks to genrate there traffic and revenue.So here we are today we have relased the widget to solve all these problems with the simplicity and with the great ease colourfull social buttons with hover effect which will enhance your blog beauty we have put a new entire look to it which will greatly enhance your visitors so in this post we will tell you ,How to add colourfull social buttons with hover effect to your blogger blog.


How To Add Social Media Buttons To Your Blogger Sidebar   

  • Go to your blog Layout section > Add A Gadget > HTML
  • Paste the above whole html code in it and save it 
                                                                                      

                     <div class="widget-wrap"> <div class="textwidget"><div class="btnt-chronicl-social"><ul><li><a class="rss" href="http://feeds.feedburner.com/blogging-heaven" target="_blank" rel="nofollow">Subscribe to the RSS Feed</a></li><li><a class="twitter" href="https://twitter.com/bloggingheaven" target="_blank">Follow us on Twitter</a></li><li><a class="facebook" href="http://www.facebook.com/bloggingheaven" target="_blank" rel="nofollow">Find us on Facebook</a></li><li><a class="google" href="https://plus.google.com/b/117673509889199905342/117673509889199905342" target="_blank" rel="nofollow">Join us on Google+</a></li><li><a class="linkedin" href="http://my.linkedin.com/bloggingheaven/" rel="nofollow" target="_blank">Connect with me on LinkedIn</a></li></ul></div><style type="text/css">/*<![CDATA[*/ .btnt-chronicl-social { width: 270px; margin: -10px; }.btnt-chronicl-social ul { margin: 0; padding: 0; }.btnt-chronicl-social ul li { list-style:none; padding: 0; text-transform: none; }.btnt-chronicl-social ul li a { color: #fff; display:block; }.btnt-chronicl-social ul li a:hover { color: #c9c9c9; background-color: #333; }.btnt-chronicl-social ul li .rss { background: url("http://i1203.photobucket.com/albums/bb382/chandeep10/social-icons/RSS-1.png") no-repeat scroll 10px center #F87E12; background-size: 20px; padding: 17.5px 45px; }.btnt-chronicl-social ul li .twitter { background: url("http://i1203.photobucket.com/albums/bb382/chandeep10/social-icons/Twitter.png") no-repeat scroll 10px center #4CACEE; background-size: 20px; padding: 17.5px 45px;}.btnt-chronicl-social ul li .facebook { background: url("http://i1203.photobucket.com/albums/bb382/chandeep10/social-icons/Facebook-1.png") no-repeat scroll 10px center #3B5998; background-size: 20px; padding: 17.5px 45px; }.btnt-chronicl-social ul li .google { background: url("http://i1203.photobucket.com/albums/bb382/chandeep10/social-icons/google.png") no-repeat scroll 10px center #D44937; background-size: 20px; padding: 17.5px 45px; }.btnt-chronicl-social ul li .linkedin { background: url("http://i1203.photobucket.com/albums/bb382/chandeep10/social-icons/LinkedIn-1.png") no-repeat scroll 10px center #3692C3; background-size: 20px; padding: 17.5px 45px; }/*]]>*/</style></div> </div> 

Change The Username In The Code 

  1. Red one with your feedburner username
  2. Brown one with your twitter username
  3. Green one with your facebook username
  4. Blue one with your linked in username
If you want to remove the linked in tab cuz most of us dont have the linked in profile so just remove the coloured  line in the code
                  <li><a class="linkedin" href="http://my.linkedin.com/bloggingheaven/" rel="nofollow" target="_blank">Connect with me on LinkedIn</a></li>

Read More »
Related Posts Plugin for WordPress, Blogger...

Subscribe Updates, Its FREE!